搭建 MySQL 源码阅读和调试环境
Abstract
教你 10 分钟搭建一个可以断点调试和阅读 MySQL 8.0 源代码的环境。
你需要有一个运行 Rocky Linux 9 操作系统的虚拟机(下文中我都称它为远程主机),和一台安装了 Visual Studio Code 的个人电脑。我们会把 MySQL 程序和源代码安装在远程主机上,个人电脑只安装 VS Code 插件,远程断点调试。
为什么使用 Ansible 搭建
因为 Ansible 可以保证幂等性,即无论执行多少次 Ansible 脚本,服务器的最终状态是一致的。Ansible 脚本采用 YAML 语法,描述我们希望服务器达到的状态。即使你不懂 Ansible 脚本也没关系,因为我们的目标是搭建环境,不是弄懂 Ansible 脚本,所以直接复制使用即可。
准备工作
安装 Ansible
控制台输出
Importing GPG key 0x350D275D:
Userid     : "Rocky Enterprise Software Foundation - Release key 2022 <[email protected]>"
Fingerprint: 21CB 256A E16F C54C 6E65 2949 702D 426D 350D 275D
From       : /etc/pki/rpm-gpg/RPM-GPG-KEY-Rocky-9

Installed:
ansible-core-1:2.14.17-1.el9.x86_64
git-core-2.43.5-2.el9_5.x86_64
python3-cffi-1.14.5-5.el9.x86_64
python3-cryptography-36.0.1-4.el9.x86_64
python3-packaging-20.9-5.el9.noarch
python3-ply-3.11-14.el9.0.1.noarch
python3-pycparser-2.20-6.el9.noarch
python3-pyparsing-2.4.7-9.el9.noarch
python3-pyyaml-5.4.1-6.el9.x86_64
python3-resolvelib-0.5.4-5.el9.noarch
python3-setuptools-53.0.0-13.el9.noarch
sshpass-1.09-4.el9.x86_64
安装 Ansible collections
[root@localhost ~]# ansible-galaxy collection install community.general:9.5.5 community.mysql:3.13.0 ansible.posix:1.5.4
控制台输出
Starting galaxy collection install process
Process install dependency map
Starting collection install process
Downloading https://galaxy.ansible.com/api/v3/plugin/ansible/content/published/collections/artifacts/community-general-9.5.5.tar.gz to /root/.ansible/tmp/ansible-local-11487a47h3w9c/tmpuc5lb3g_/community-general-9.5.5-c_80a_m1
Installing 'community.general:9.5.5' to '/root/.ansible/collections/ansible_collections/community/general'
Downloading https://galaxy.ansible.com/api/v3/plugin/ansible/content/published/collections/artifacts/community-mysql-3.13.0.tar.gz to /root/.ansible/tmp/ansible-local-11487a47h3w9c/tmpuc5lb3g_/community-mysql-3.13.0-xhndeqn5
community.general:9.5.5 was installed successfully
Installing 'community.mysql:3.13.0' to '/root/.ansible/collections/ansible_collections/community/mysql'
Downloading https://galaxy.ansible.com/api/v3/plugin/ansible/content/published/collections/artifacts/ansible-posix-1.5.4.tar.gz to /root/.ansible/tmp/ansible-local-11487a47h3w9c/tmpuc5lb3g_/ansible-posix-1.5.4-7i4qmhu_
community.mysql:3.13.0 was installed successfully
Installing 'ansible.posix:1.5.4' to '/root/.ansible/collections/ansible_collections/ansible/posix'
ansible.posix:1.5.4 was installed successfully
创建 Ansible 脚本
将下面的脚本内容直接复制粘贴
---
- name: Build MySQL debug environment
  hosts: localhost
  become: true
  vars:
    mysql_root_password: MyNewPass4!
  tasks:
    - name: Install MySQL official yum repo
      ansible.builtin.dnf:
        name: https://repo.mysql.com/mysql80-community-release-el9.rpm
        state: present
        disable_gpg_check: true

    - name: Install dependencies
      ansible.builtin.dnf:
        name:
          - gcc-c++
          - gdb
          - tar
          - python3-PyMySQL
          - python3-firewall
          - mysql-selinux
          - mysql-community-server-debug
          - mysql-community-server-debug-debuginfo
        state: present
        enablerepo:
          - mysql80-community
          - mysql80-community-debuginfo
        disable_gpg_check: true

    - name: Edit my.cnf
      community.general.ini_file:
        path: /etc/my.cnf
        owner: root
        group: root
        mode: "0644"
        section: mysqld
        option: log_timestamps
        value: SYSTEM

    - name: Ensure /var/lib/mysql is absent
      ansible.builtin.file:
        path: /var/lib/mysql
        state: absent

    - name: Initialize database
      ansible.builtin.shell:
        cmd: /usr/sbin/mysqld --initialize-insecure --user=mysql

    - name: Start service temporarily
      ansible.builtin.systemd_service:
        name: mysqld
        state: started
        enabled: false
        daemon_reload: true

    - name: Set root password
      community.mysql.mysql_user:
        name: root
        plugin: caching_sha2_password
        plugin_auth_string: "{{ mysql_root_password }}"
        password_expire: never

    - name: Create user 'example'@'%'
      community.mysql.mysql_user:
        login_user: root
        login_password: "{{ mysql_root_password }}"
        name: example
        plugin: caching_sha2_password
        plugin_auth_string: "{{ mysql_root_password }}"
        host: "%"
        priv: "*.*:ALL"

    - name: Stop service
      ansible.builtin.systemd_service:
        name: mysqld
        state: stopped
        enabled: false

    - name: Enable mysql service in firewalld if firewalld is running
      ansible.posix.firewalld:
        service: mysql
        state: enabled
        permanent: true
        immediate: true
        offline: true
执行脚本,静静等待完成即可,网速快的话大约 3 分钟就好了。
控制台输出
[WARNING]: provided hosts list is empty, only localhost is available. Note that
the implicit localhost does not match 'all'

PLAY [Build MySQL debug environment] *********************************************

TASK [Gathering Facts] ***********************************************************
ok: [localhost]

TASK [Install MySQL official yum repo] *******************************************
changed: [localhost]

TASK [Install dependencies] ******************************************************
changed: [localhost]

TASK [Edit my.cnf] ***************************************************************
changed: [localhost]

TASK [Ensure /var/lib/mysql is absent] *******************************************
changed: [localhost]

TASK [Initialize database] *******************************************************
changed: [localhost]

TASK [Start service temporarily] *************************************************
changed: [localhost]

TASK [Set root password] *********************************************************
[WARNING]: Option column_case_sensitive is not provided. The default is now
false, so the column's name will be uppercased. The default will be changed to
true in community.mysql 4.0.0.
changed: [localhost]

TASK [Create user 'example'@'%'] *************************************************
changed: [localhost]

TASK [Stop service] **************************************************************
changed: [localhost]

TASK [Enable mysql service in firewalld if firewalld is running] *****************
changed: [localhost]

PLAY RECAP ***********************************************************************
localhost                  : ok=11   changed=10   unreachable=0    failed=0    skipped=0    rescued=0    ignored=0
配置 Visual Studio Code
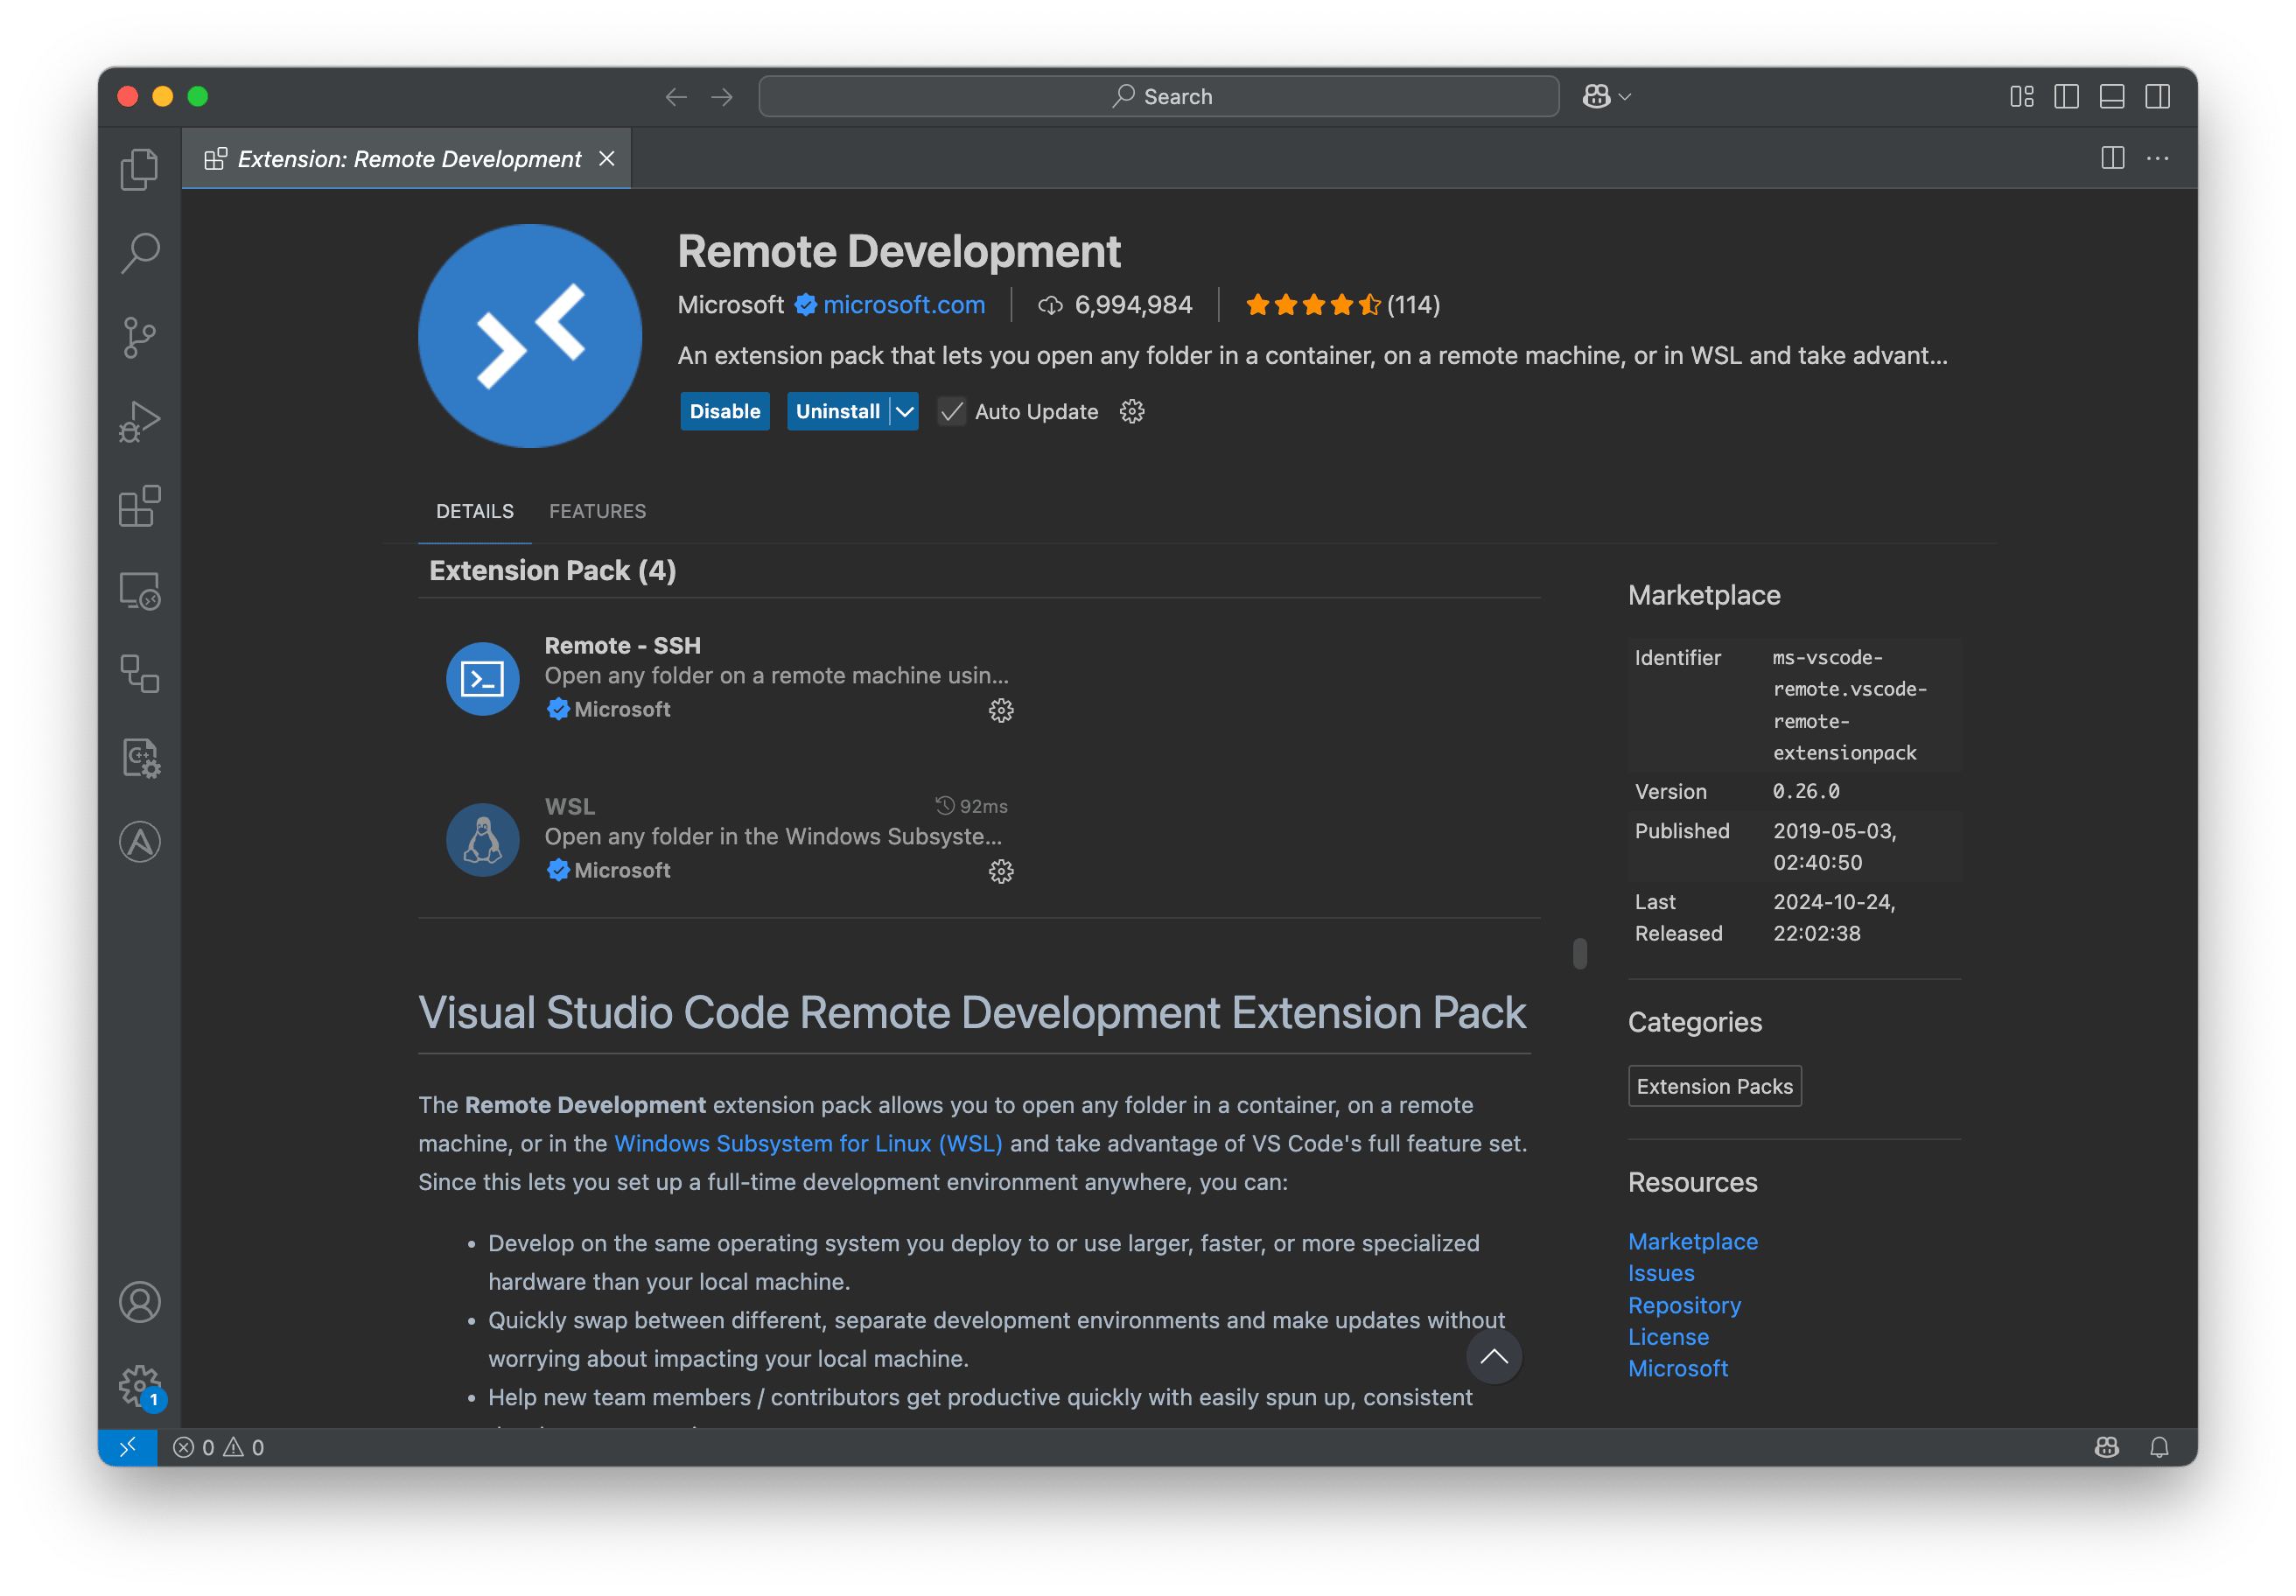
安装 Remote Development 插件
远程登录
我们使用上一步安装好的 Remote Development 插件打开远程主机的源代码目录,作为 VS Code 的工作区。MySQL 源代码在我们执行 Ansible 脚本的时候安装好了,不用担心。
安装 C/C++ Extension Pack 插件
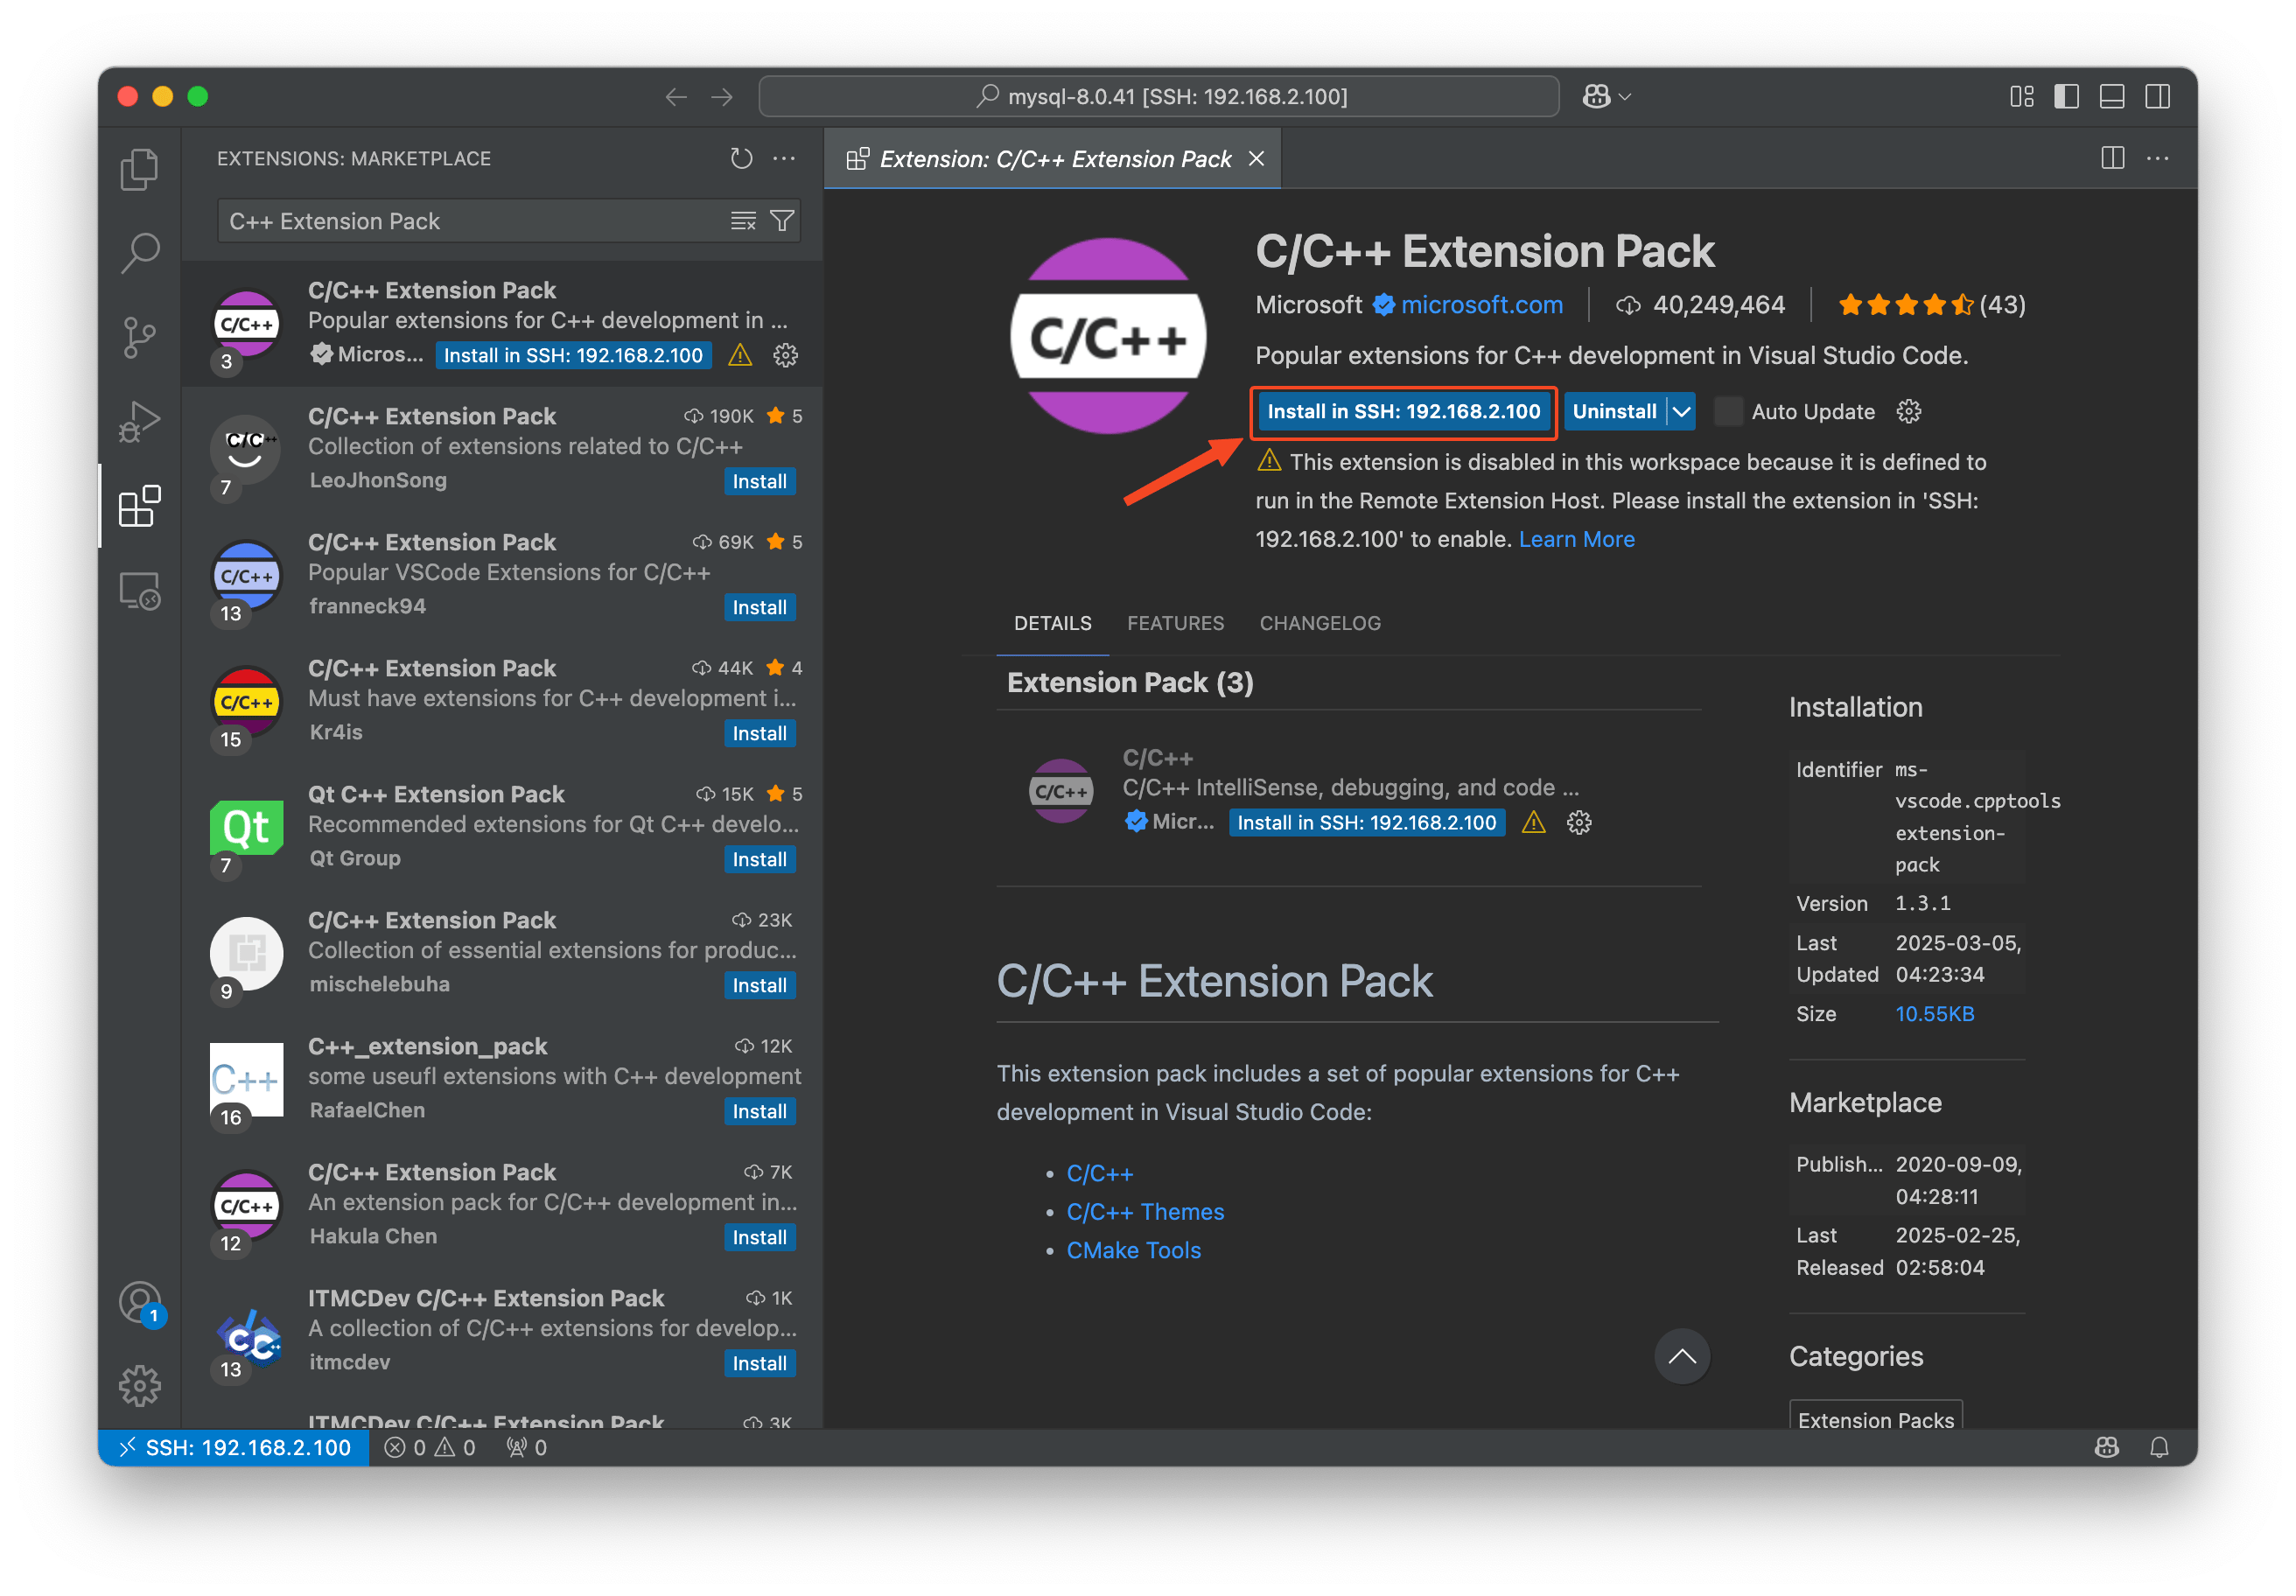
完成上一步的操作后,我们就把远程主机的源代码目录作为了 VS Code 的工作区。现在我们要在远程主机上安装 C/C++ Extension Pack 插件。在插件市场搜索到该插件后,会显示上图所示的安装在远程主机的按钮。
配置文件
最后,在工作区根目录下新建 .vscode 目录,然后在目录下新建 2 个 json 配置文件,文件内容按照我写的复制粘贴即可。完成这一步后,立刻就能调试了。
{
    "version": "0.2.0",
    "configurations": [
        {
            "name": "Debug MySQL",
            "type": "cppdbg",
            "request": "launch",
            "program": "/usr/sbin/mysqld-debug",
            "args": [
                "--defaults-file=/etc/my.cnf",
                "--user=mysql"
            ],
            "stopAtEntry": true,
            "cwd": "${workspaceFolder}",
            "environment": [],
            "externalConsole": false,
            "MIMode": "gdb",
            "setupCommands": [
                {
                    "description": "Enable pretty-printing",
                    "text": "-enable-pretty-printing",
                    "ignoreFailures": true
                }
            ]
        }
    ]
}
{
    "C_Cpp.default.compilerPath": "/usr/bin/c++",
    "C_Cpp.errorSquiggles": "disabled"
}
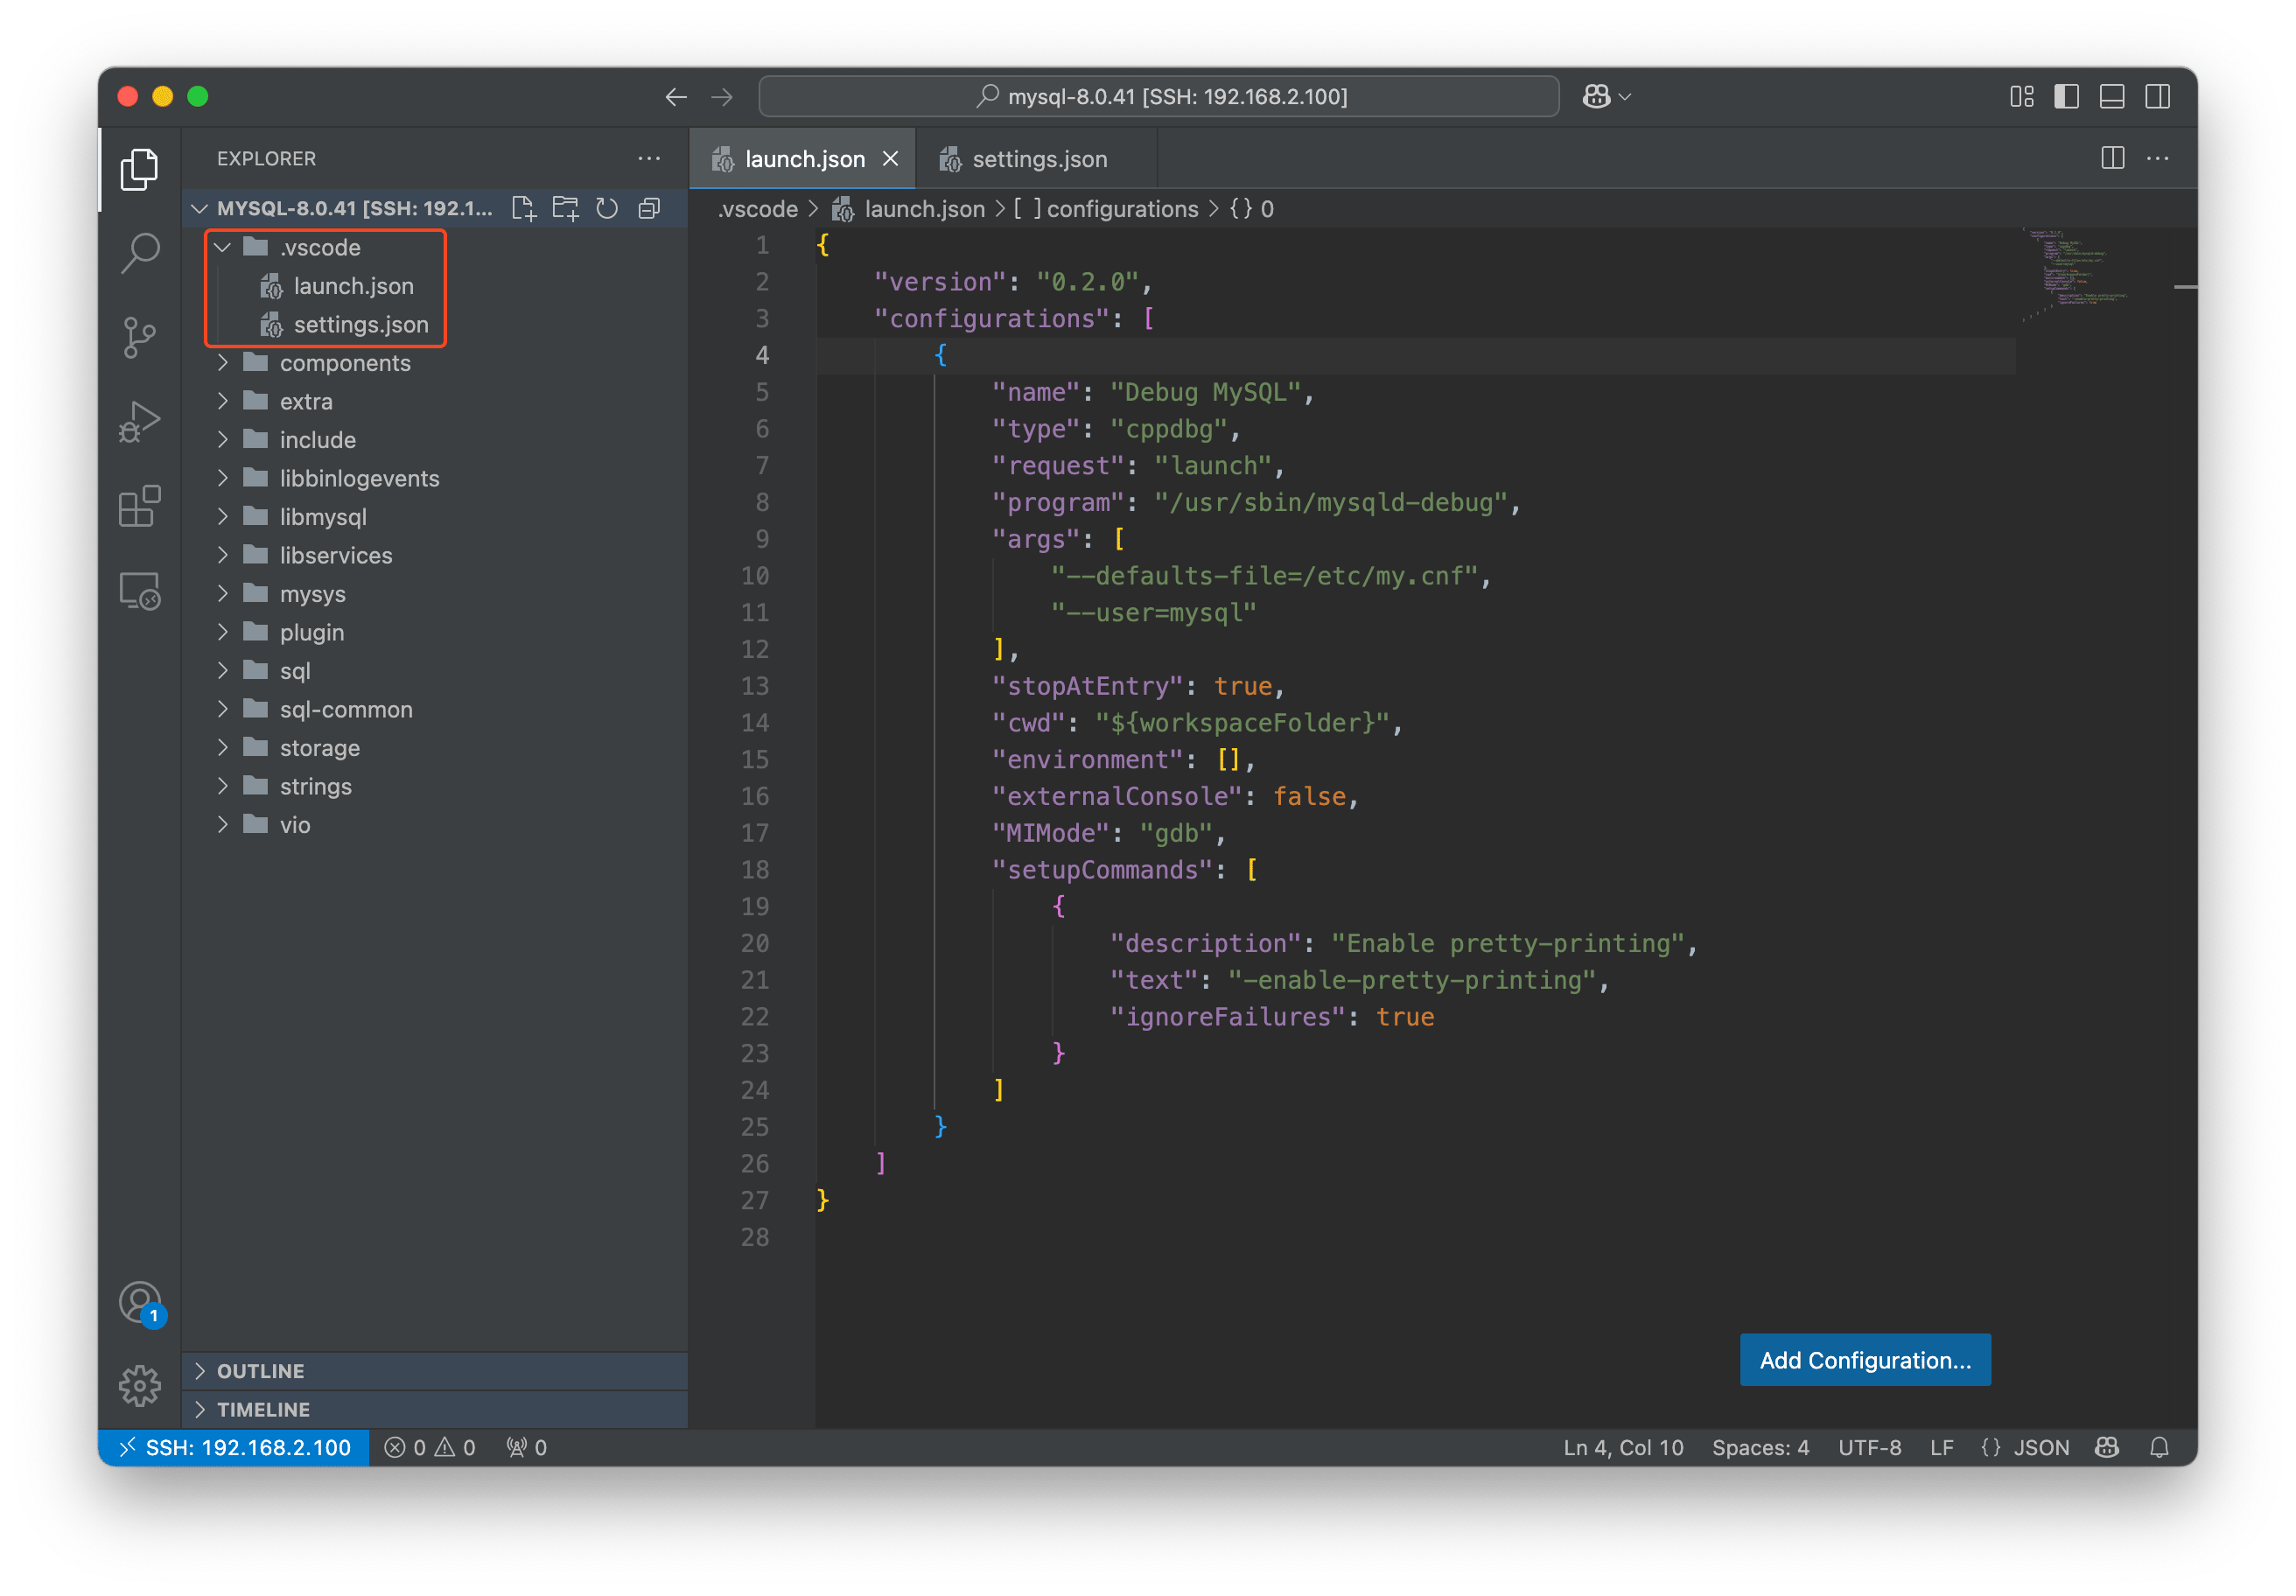
目录结构
启动调试
看,是不是非常简单 。我们启动调试后,程序会在入口函数 main 处停下,等待我们的指令。你可以单击 F7 进入 main 函数,然后使用 F8 一步一步往下走。如果你不希望每次启动调试时,程序都停在 main 函数处,那么可以修改
 .vscode/launch.json 中的 stopAtEntry 属性为 false。
下一篇,我们开始正式阅读 MySQL 源码。